Enable M365 & Security Group Writeback to AD

Group writeback depends on the sync engine you’re using, and not all group types are supported in both.
• Security groups → Entra Cloud Sync
• Microsoft 365 groups → Entra Connect SyncGroup Writeback v2 in Entra Connect Sync is deprecated and no longer supported.
Microsoft recommends using Entra Cloud Sync for security group writeback going forward.If you don’t need Microsoft 365 group writeback, Cloud Sync is the preferred approach.
If you do, you can run both side-by-side using Cloud Sync for security groups and Connect Sync (v1) for M365 groups.
Writeback architecture and behavior
Group writeback is split across two different sync engines.
Using Microsoft Entra Connect Sync
• Required for Microsoft 365 group writeback
• Uses Group Writeback v1
• Still supported, but not evolving
Using Microsoft Entra Cloud Sync
• Used for security group writeback
• Recommended path going forward
• Replaces deprecated Group Writeback v2 from Connect
Simple way to think about it:
• M365 Groups → Entra Connect Sync
• Security Groups → Entra Cloud Sync
What actually gets written back
When groups are written back from Entra ID to AD, they don’t come back as the same object type.
Microsoft 365 Groups
• Written back as mail-enabled security groups in AD (Connect Sync)
Security Groups
• Written back as standard security groups in AD (Cloud Sync)
• Objects are created in the target OU you define
This matters because downstream apps in AD will see these as security groups, not M365 groups.
Limitations to be aware of
These are the things that usually cause confusion during testing.
Microsoft 365 Groups (Entra Connect)
• Written back as mail-enabled security groups
• Not all M365 features translate on-prem
• May require Exchange hybrid depending on use case
Security Groups (Cloud Sync)
• Only supports cloud-created security groups (or ones converted to cloud SOA)
• Does not support nested group writeback
• Members must already exist in AD to sync properly
• No support for Microsoft 365 groups
What to check when it’s “not working”
• Group type is supported (M365 vs Security)
• Correct sync method is being used
• Target OU is configured correctly
• Cloud Sync provisioning job is running
• Group membership objects exist in AD
• No filtering rules blocking the group
Most “it’s not syncing” issues come down to one of those.
Design guidance
• Use Cloud Sync for all new security group writeback scenarios
• Use Entra Connect only when you need M365 group writeback
• Don’t try to force one tool to do both
• Keep your design simple and aligned to Microsoft’s direction
Here’s how to enable each option. Expand the section that applies to your setup.
1. If you’re upgrading from an earlier version, you may need to run PowerShell permissions command on the Entra Cloud Sync server:
Import-Module "C:\Program Files\Microsoft Azure AD Connect Provisioning Agent\Microsoft.CloudSync.Powershell.dll"

$credential = Get-Credential

Set-AADCloudSyncPermissions -PermissionType UserGroupCreateDelete -TargetDomain "domain.com" -EACredential $credential
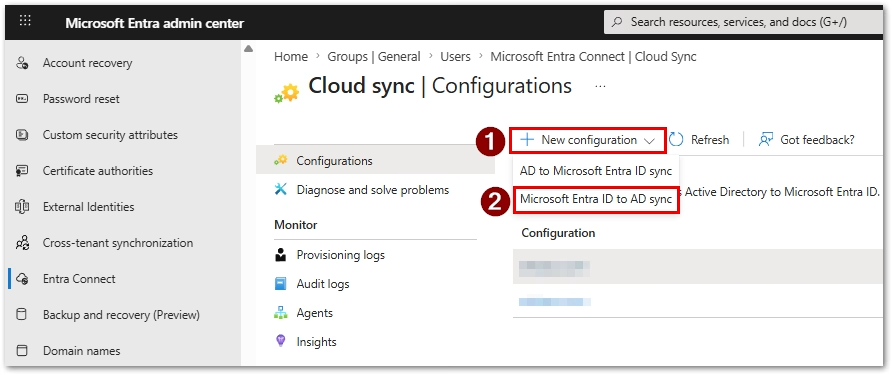
2. Create a new Entra to AD sync configuration in Entra portal:
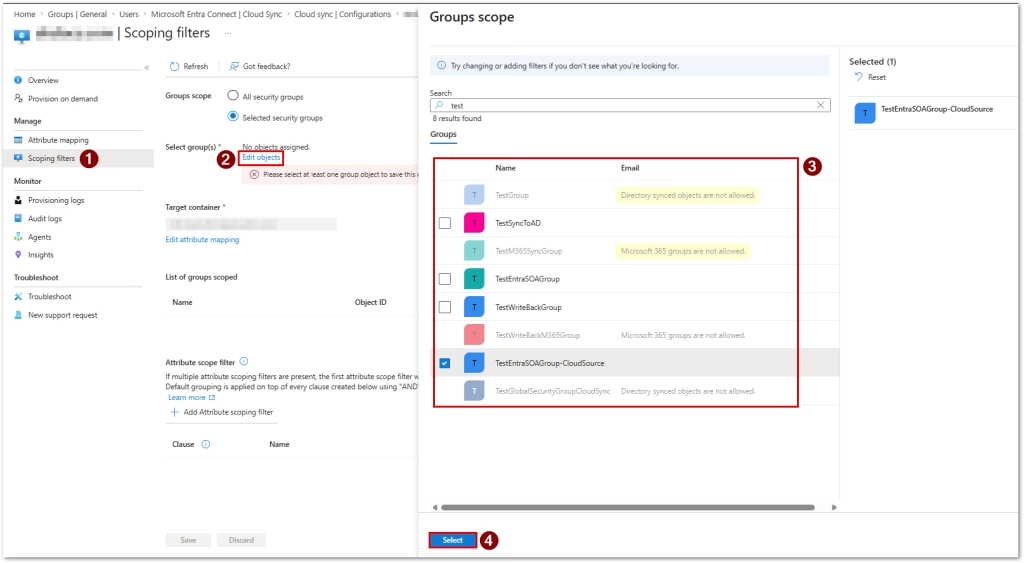
3. Select your Scoping filters, choosing the groups to sync (note you can’t sync Microsoft 365 groups or Directory synced objects, unless objects are converted to Cloud SOA):
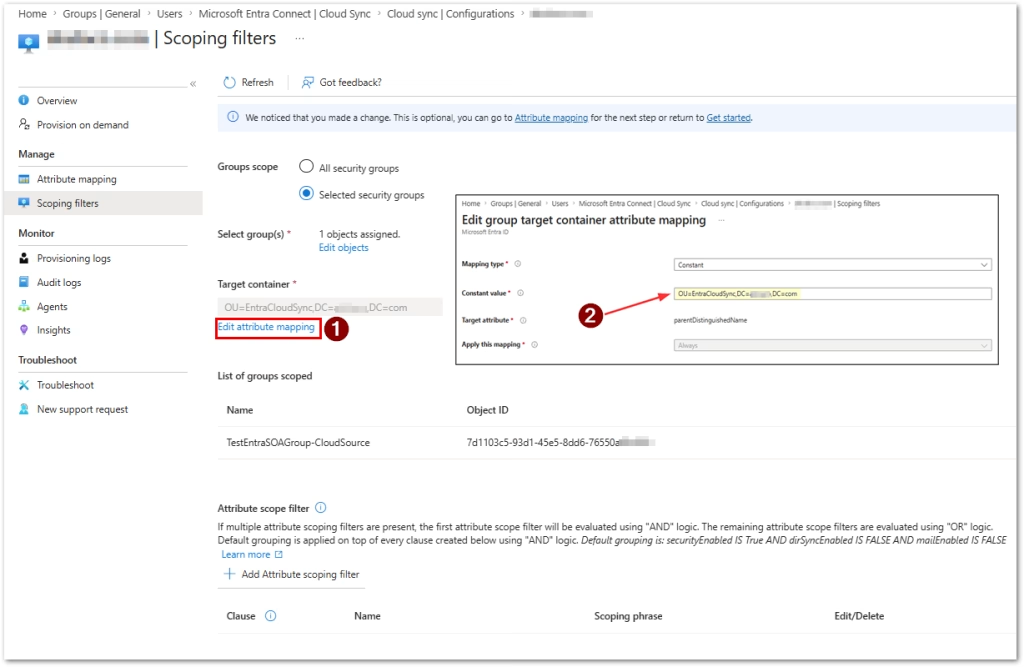
4. Add your target container where to sync in AD:
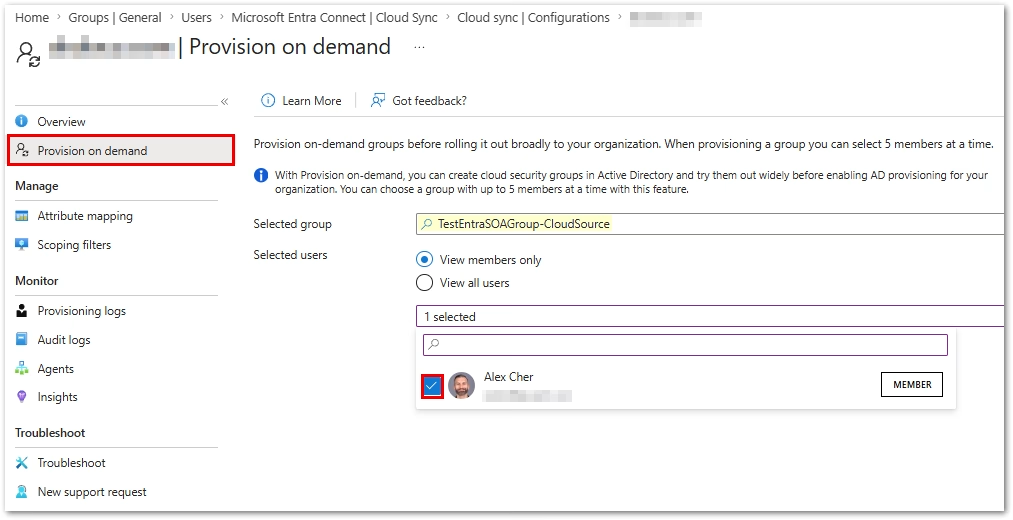
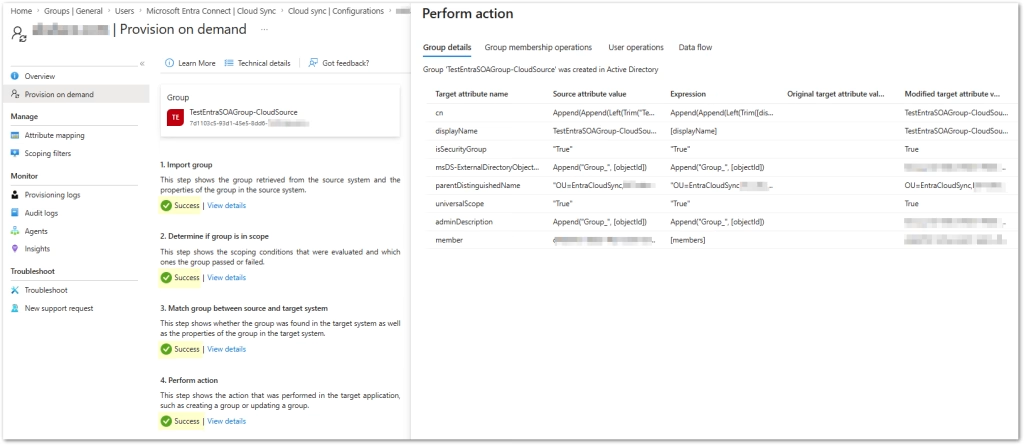
5. Test by provisioning your group on demand. Select the members to sync.
6. Confirm your action is successful:
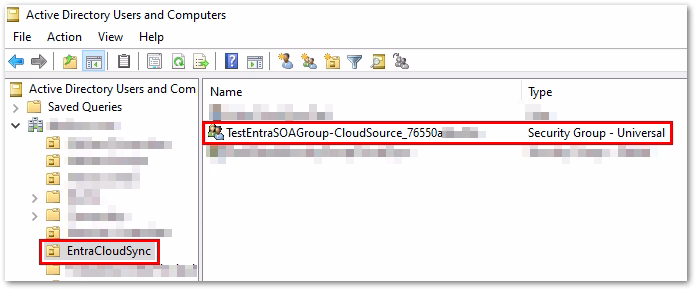
7. Check the target AD OU to confirm the Security group synced as a Universal group:
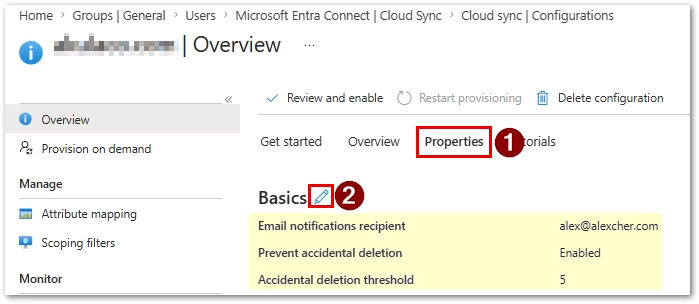
8. If satisfied with your configuration, set properties for your sync rule:
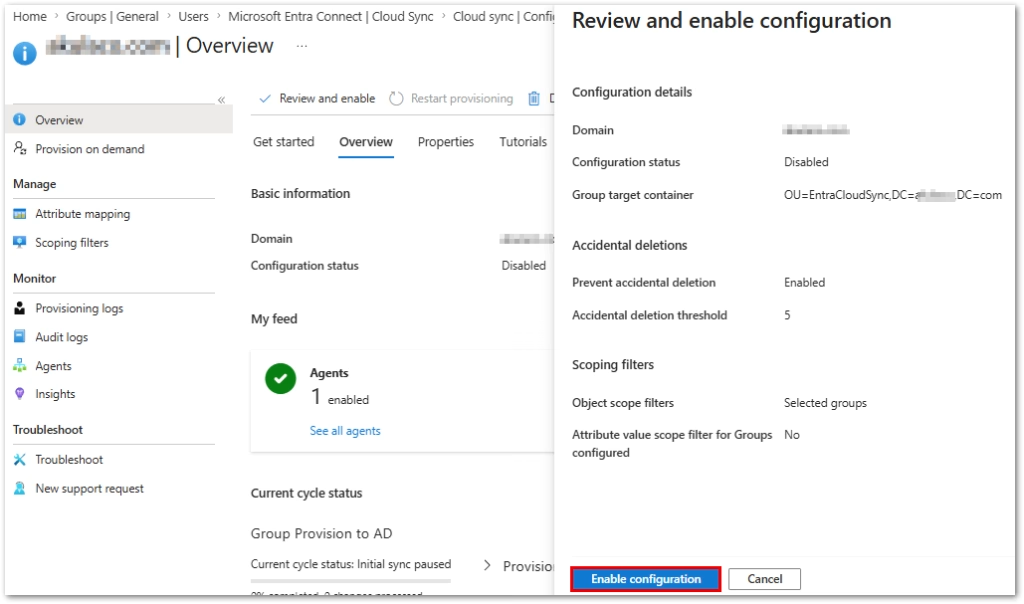
9. Finally, enable the sync configuration:
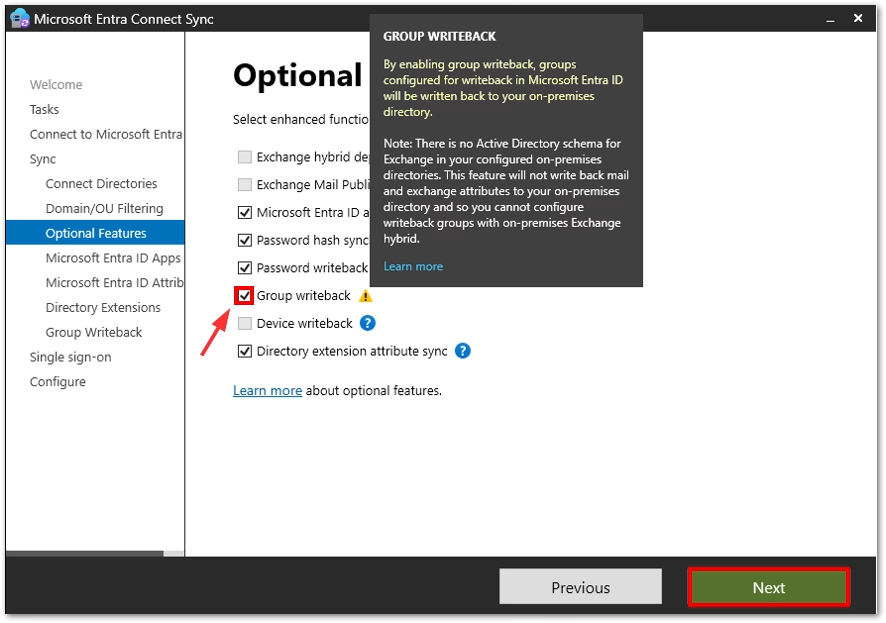
1. Enable Group Writeback in Entra Connect Sync configuration:
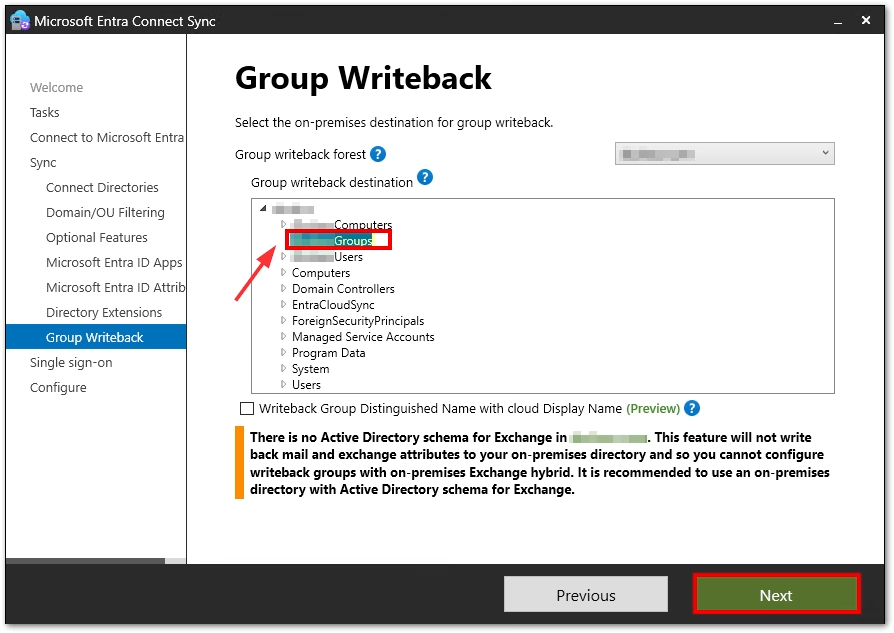
2. Set destination for Microsoft 365 group writeback:
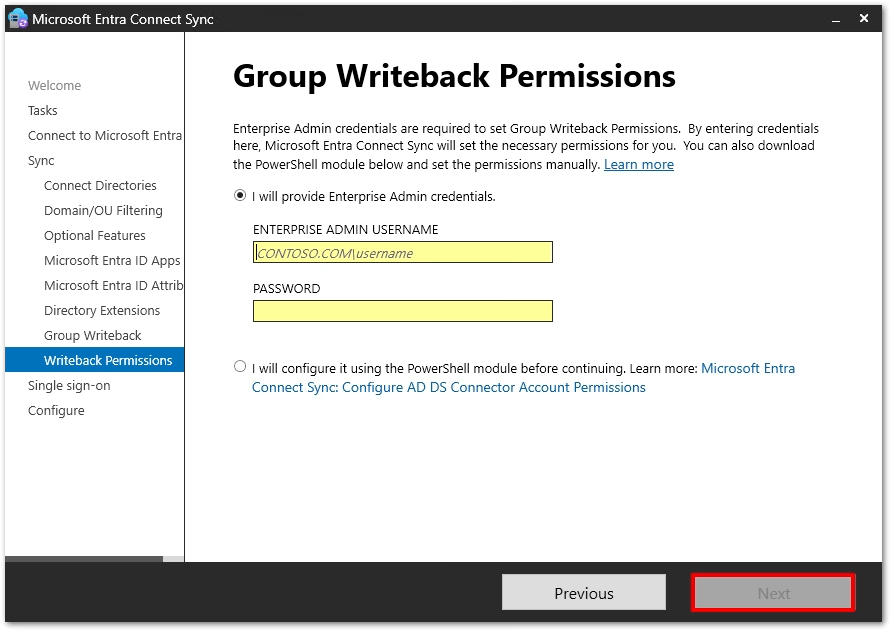
3. Enter Enterprise Admin permissions:
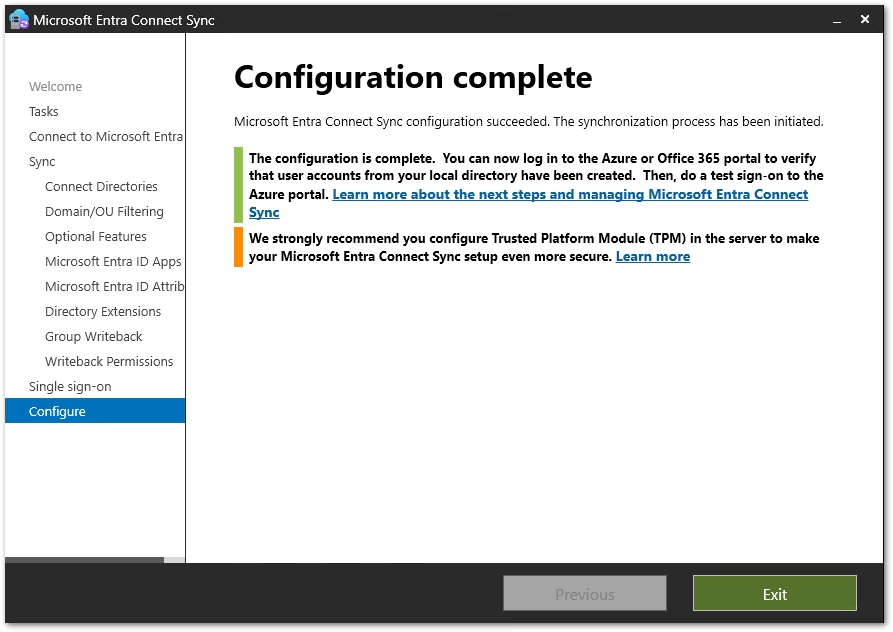
4. Verify successful completion:
References
• Microsoft Entra Cloud Sync – Group writeback and provisioning to AD
https://learn.microsoft.com/en-us/entra/identity/hybrid/cloud-sync/how-to-configure-entra-to-active-directory
• Microsoft Entra Cloud Sync – Migrate group writeback from Entra Connect
https://learn.microsoft.com/en-us/entra/identity/hybrid/cloud-sync/migrate-group-writeback
• Microsoft Entra Connect Sync – Enable group writeback (v1)
https://learn.microsoft.com/en-us/entra/identity/hybrid/connect/how-to-connect-group-writeback-enable
Found this useful? Share with others: